Step 3: Choose Backup Storage
This page describes the third step of creating a backup task with the New Task Wizard.
On the third step of the New Task Wizard, you need to select where you want to store the backup. The window consists of two panes: Storage Destinations and Folder Selection.
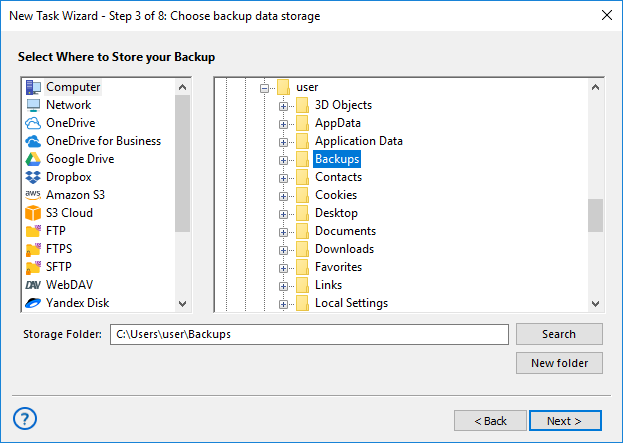
- In the Storage Destinations pane, you can see different types of storage where you can copy your data. For example, if you want to store backups in local file system, you need to select Computer.
Technically, storage destinations are plug-ins. During the trial period, you can use all plug-ins without any limitations. After registration, the list of plug-ins will be limited respectively to the edition you register. To learn more, please see Registration...
- In the Folder Selection pane, you can see folders available in the selected destination.
Note: Most of the storage plug-ins are configurable. For example, to store backups on FTP, you will need to create an FTP configuration. To learn more, please see Plug-in Configurations...
Selecting Destination
To select backup destination, follow these steps:
- (Server edition only) In the dropdown menu at the top left corner of the window, select Workstation that will store the data.
- In the Storage Destinations pane, select a plug-in. The list of folders appears in the Folder Selection pane.
- In the Folder Selection pane, browse for a target folder. To create a new folder, use the Create folder button.
- When finished selecting destination folder, click Next.
Contents: