Oracle Plug-in - Restoring
Preparing Oracle to Accept a Lost Database
To make a destination for a lost or moved Oracle database, please follow the next instruction.
- Make a new database with the same BASE_NAME and SID as for your database backup. You can use the Database Configuration Assistant to make a new database. Please check that the paths for data keeping correspond to the paths for a backup base.
- Stop the database instance service and all control processes (controlfile) for a newly created database.
- Restart this service again.
- Restore the database content as described below.
- Wait until finishing the restoration process.
If an auto restoring does not complete by some reason, we are recommending restoring the lost database manually using Handy Backup files. In this cause, please report to our technical support by sending an email at an address: [email protected].
Restoration
To restore an Oracle database from backup using the Oracle plug-in, please follow these steps:
- Click the New Task icon on the toolbar.
- Select Restore task, and then click Next to go to the Step 2.
- Browse your backup destination for the index file (backup.hbi) located in the destination folder. Select it, and then click Next.
- In the Select Restore Locations dialog, verify the details of restoration.

Selecting Oracle restoration paths
Note: To connect to Oracle DBMS, the Oracle plug-in requires a ready database. If you are restoring the backup to the same location from which it was taken, then you should already have at least one database opened for backup and restore in this location. Else, or for a freshly installed Handy Backup, you must to prepare a database for restoring. To do it, please follow these steps:
- In the Select Restore Locations dialog, select any object (database or table), and then click Change Location. The Change restore location dialog opens.
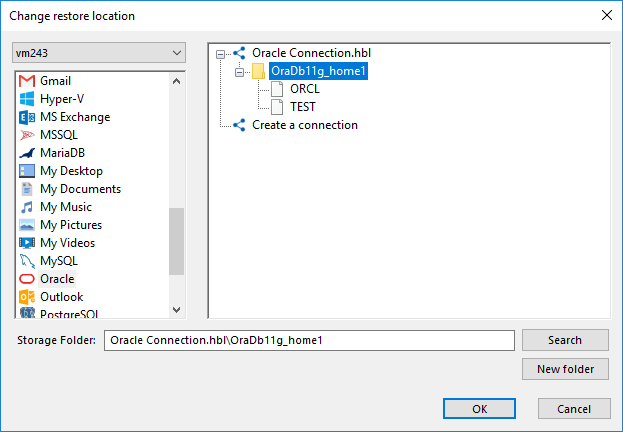
Changing restore location to see the list of the databases available for Oracle
- Make sure that Oracle is selected in the left pane.
- Prepare an Oracle database for working with, as described for general Oracle plug-in using.
- Select a database where you will plan to restore an Oracle backup content among the database list in the right pane.
After selecting the backup file to restore, you will need to select other task parameters, such as the type of restoration, enter decryption password (for an encrypted backup), etc. These steps are not specific to Oracle, and you can find the respective instructions in the Restore Task chapter.
Contents: