First Synchronize Task: Advanced Mode
This article describes how to create a data sync task by using all functions and possibilities of Handy Backup. To create such task, please follow the next instruction:
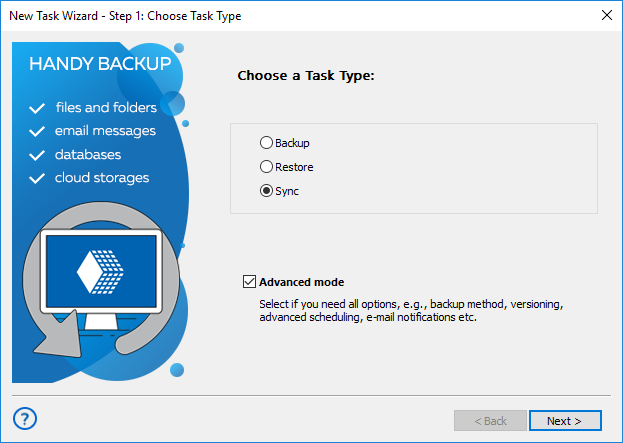
- Run a New Task Wizard by the button on the main panel or by pressing Ctrl+N.
- Select Sync and mark "Advanced Mode". Click Next.
- (For a network solution only) Select a remote machine to use it for sync a first folder in the upper left corner.
- On the left panel, click onto a plug-in name to select a first folder; for example, to choose a local folder, click Computer.
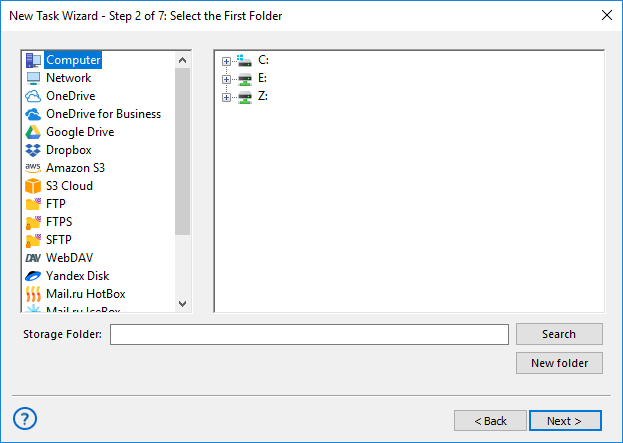
- On the right panel, select a folder for synchronization, and then click Next.
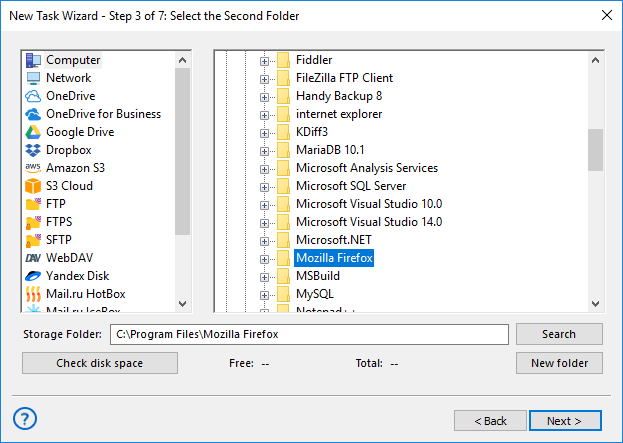
- On the next step, select a second folder by repeating pp. 3-5 for choosing it among storage plug-ins and folders.
- The next step allows you selecting sync direction. You can copy a first folder to a second folder, or vice versa or just merge the two folders content.
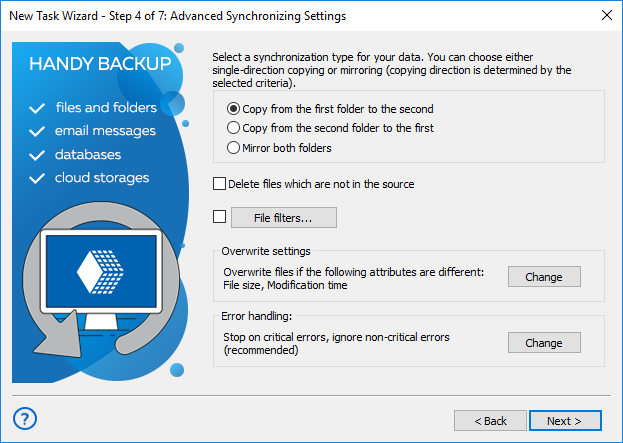
- For merging folders, you can also select what to do with identical filenames in the two folders: copy or skip. If you are copying one folder onto another, you can select an option for erasing all files except those existed in a "master" folder.
- This step also allows setting an error handling method and parameters for overwriting files with qualified attributes. Mark an option that you plan to use, and then click "Change" if you want to select another method.
- Finally, on this step you can create a file filter to seek files and subfolders for synchronization by mask of a name and/or attributes. To enable it, mark the "File filters" option and click the appropriate button to enter a setup dialog.
- After setting up your sync options on this step, click Next. The next step is for scheduling your task. If you plan to run a task in automatic mode, check the "Enable scheduler" option.
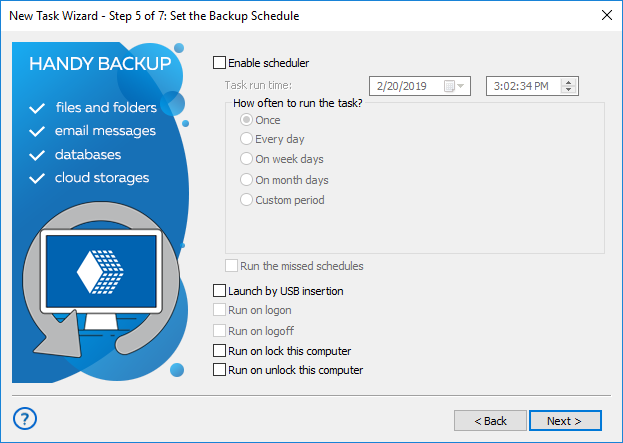
- With a scheduler, you can choose a starting time and a repeating period for a task. You can also trigger your task to launch by some system event, such as USB drive insertion or system shutdown.
- To trigger a task, just mark an appropriate event checkbox. When you finish, click Next.
- The next step allows you starting an external program before or after a task. To enable it, mark an appropriate option checkbox and then enter a command to run external software or batch file in the corresponding string.
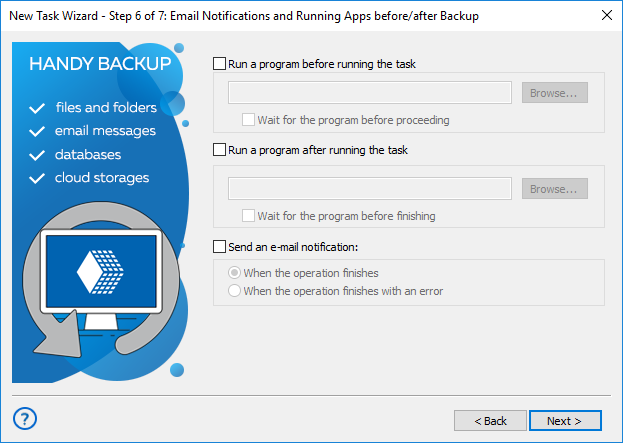
- You can also set up an email notification here. Enable it, and the program will send you a message about a task activity with a frequency that you can set up here. An email address to receive such messages you can provide in the "Settings" section.
- Click Next. On the final step of your task, give it a name. You can also mark an option to run a task immediately after finishing its creation. On the task wizard window, you can see all task parameters (return and change any of these parameters if you need it).
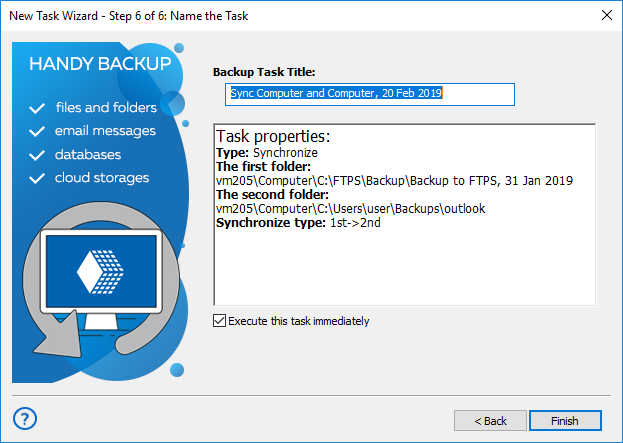
- Click Finish when all done.
Data sync is similar to backup, although it works only between data storage plug-ins and folders, and lack many backup options such as encryption, compression and versioning. Its primary purpose is to establish identity and actuality of data in two synchronized folders.
Contents: