Creating Time Stamps
Before setting up backup task with time stamps, you may carefully plan the strategy of taking and keeping copies of your data. This may be necessary for both optimizing backup frequency and saving storage space from excessive flow of data.
Performing Time-Stamped Backup
To create time stamp backup user can apply the following sequence:
- Create a new task (using the main menu or clicking the button on a control panel).
- Specify the backup task, set of data and the place to store backup file with a date-time stamp.
- On Step 4, "Backup type", select the full, incremental or differential backup.
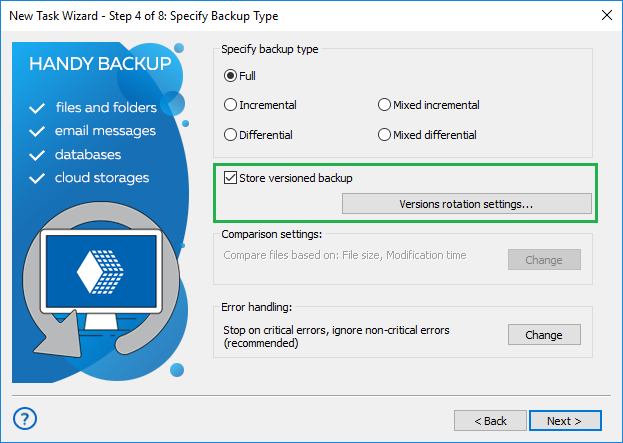
- Check the box marked "Store versioned backup" to backup with time stamp.
- The button "Versions rotation settings" will be available; press it.
- The dialog window will appear, with all the parameters for time stamp backup settings.
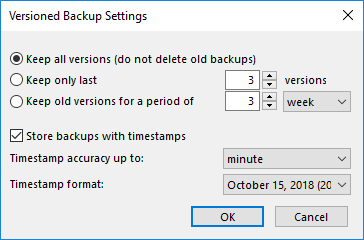
- Set up the parameters of time stamp backup and press OK.
- Continue to set other parameters of the task. These steps are not specific for backup tasks performed with time stamp.
Adding Time Stamp to an Existing Backup Task
If you are planning to add time stamps to an existing backup task, do the same except editing properties of backup task (selecting "Properties…" in the main menu or the task context menu, or using the appropriate button).
Note: Removing the time stamp from the particular backup task is impossible for now. If you need to change some time stamp settings, edit the time stamp properties instead of completely removing it.
Tags: Time Stamp Backup
Contents: