Centralized Installation of Network Agents with Centralized Deploy
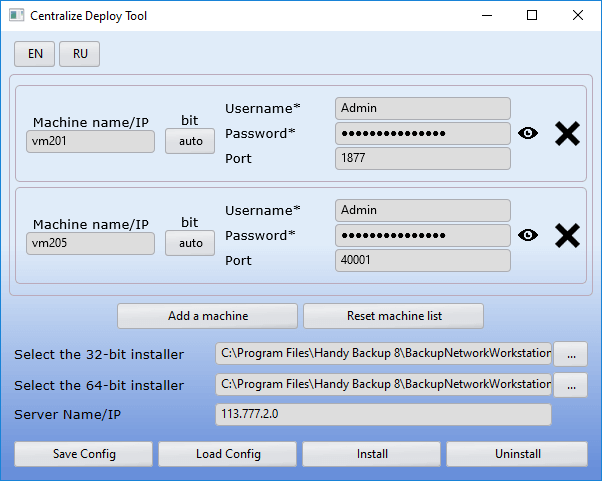
Handy Backup allows you to install Network Agents on remote machines using a special utility called Centralize Deploy Tool, which is included in the Server Backup Solution. The main window of the utility is shown below.
To perform centralized installation of Network Agents on remote machines, follow the instructions below.
Install the Handy Backup Server Network control panel on your PC. Turn on the target computer where the agent will be installed, without preinstalling anything on it.
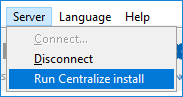
- In the main menu, select Server, then choose Run Centralize install.
- Fill in the required fields. Enter the name or IP address of the workstation where the Network Agent will be installed. Then enter the username and password (Windows login credentials) under which the installation will be performed on the remote machine.
- You can also change the installation type (32-bit or 64-bit OS) for each machine if needed. By default, the program selects Auto mode and detects the OS bitness automatically.
- You may choose any available port on the target workstation, for example, 455.
Note: You must enter the domain or computer name before the username. Also, when adding a new machine, the username and password are copied from the previous one, which is convenient if the administrator uses the same credentials on all networked machines.
Important: The Centralize Deploy Tool stores passwords in encrypted format.
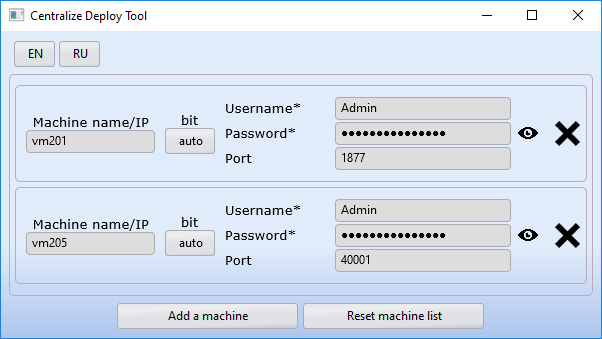
- If there are multiple workstations, after configuring the first one, click the Add a machine button and enter the settings for the next agent.
- Make sure that the program has paths set to the 32-bit and 64-bit Handy Backup installer files. If the paths were not added automatically, you must set them manually. By default, installers are located in:
C:\Program Files\Handy Backup 8\BackupNetworkWorkstation\Packet\Distrib\
If for some reason the installer files were not added during installation, download them manually and specify the paths in the program:
- Installer for 32-bit OS: handybackup_setup.msi.
- Installer for 64-bit OS: handybackup_setup_x64.msi.
- Next, enter the name or IP address of the server PC where the control panel is installed.
- You can save the installation configuration and reuse it later. To do so, click the "Save Config" button. To load saved settings, click "Load Config" and select the desired configuration file.
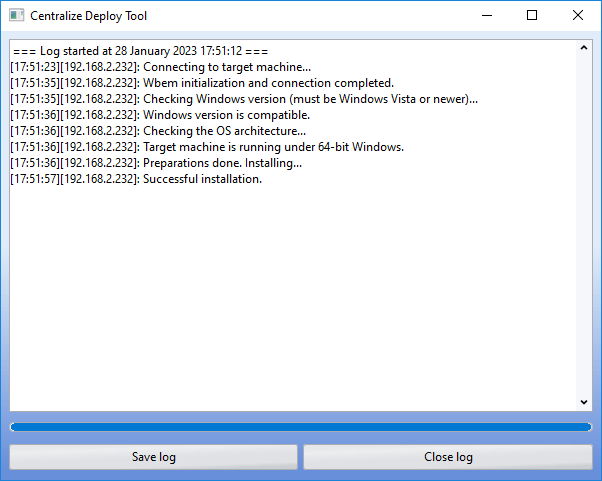
- The utility is now ready to install the software. If all data is correct, click Install. If successful, a window will appear saying Installation Completed Successfully.
The program creates an installation log during operation. You can save the log content for later analysis of messages.
The installer has completed its work. Now configure the network version of Handy Backup to work with Network Agents on remote computers.
Learn more about what to do if a WMI error occurs in Centralize Deploy Tool.
Contents: