Server Network FAQ
Updated on June 24, 2026
Applies to: Handy Backup
The Standard edition is a client for the Network edition, isn’t it?
No. Handy Backup Standard is a separate application which is not meant to be used as a client of Handy Backup Server Network. The right software to install on network workstations is called Backup Network Workstation: select it when you are prompted to select an application during Handy Backup installation. For more details, please refer to Handy Backup Installation in the User Manual.
For a complete guide on deployment of Handy Backup Server Network, please refer to Installation of Handy Backup Server Network in the User Manual.
Related solutions: Handy Backup Server Network.
Why did some of my workstations disappear from the list?
If some of your workstations disappeared from the list of computers available for backup, try this:
- Make sure that Backup Network Workstation service is running on every PC. If doesn’t, launch it.
- Make sure that Handy Backup Server Network, Backup Network Coordinator and Backup Network Workstation are in your firewall exceptions list. For proper work of Handy Backup Server Network, they must be able to communicate with each other.
You can read how to install and configure agents for Windows in the User Manual of Handy Backup.
Related solutions: Handy Backup Server Network.
Can I back up workstations if my server is not in the same domain?
To back up workstations that are located in a different domain, local user of Handy Backup Server Network must match the user specified as backup administrator (which is done during the installation).
For more details about roles in network backup, please refer to Installation of Handy Backup Server Network in the User Manual.
Related pages: User Manual about Workstation Configuration.
Related solutions: Handy Backup Server Network.
How to change a temporary folder for a workstation?
The settings of a "Temp" folder available in the control menu are for the server part of the application only. Presumably, the pathname to “Temp” folders for workstations remains the same as default, to provide more compatibility in a heterogeneous network. However, you can change it manually!
- Quit Handy Backup. Also, stop a Windows service (if you run Handy Backup in a service mode).
- Open the file using any editor for plain text files, such as Windows Notepad.
C:\ProgramData\Novosoft\
(Here the [username] is a name of a user who own the instance of Handy Backup.)
- In this file, find the string
C:\TMP\
- Change the path "C:\TMP" to a desired path to your workstation temporary folder.
- Save changes, and then restart Handy Backup (as a service or as application).
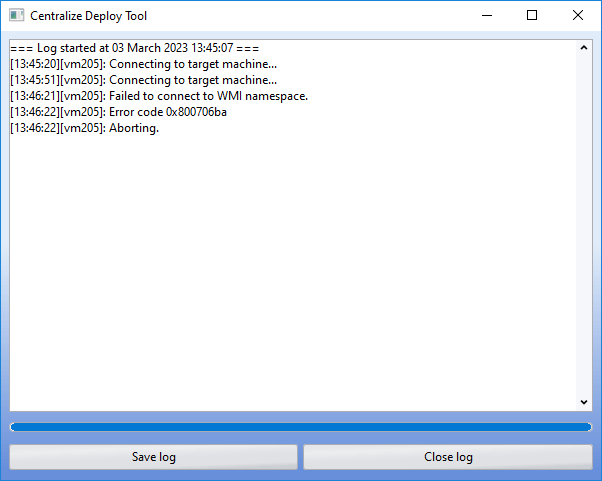
Fixing the WMI error in Centralize Deploy Tool
If a WMI error occurs after centralized agent installation via Centralize Deploy tool, use the instructions:
First, make sure that the winmgmt RpcSs and RpcEptMapper services are running, they are required to establish a remote connection with the machine.
If the services are running, but the installation fails to establish a connection with WMI, then you need:
1. Check the WMI settings:
- Open the WMI settings, to do this, press Win+R, and in the window that appears, enter wmimgmt.msc, then press Enter.
- In the opening window click on the “WMI Control” and open properties, go to the Security tab.
- In the security tab, open the Root element, select the CIMV2 element and click the Security button.
- In the opening security Root\CIMV2 window, you need to add the “DCOM users” group and grant it permissions.
- Save and close.
2. Check the membership of the admin user in the group:
The administrator is considered to be the user system on the agent’s machine (whose login is used), it is also specified in the connection settings in the “user” field in the Centralize Deploy Tool.
- Open the administrative utility “local users and groups”, (press Win+R, and in the appearing window enter lusrmgr.msc, then press Enter).
- In the window that opens go to the Users folder. Select the desired user, click on the RMB and open the properties.
- In the window that opens, go to the “Group Membership” tab, and add the “DCOM Users” group.
- Apply and close.
3. Check DCOM security settings:
- Open component services, to do this, press Win+R, and in the window that appears, enter dcomcnfg, then press Enter.
- In the appearing window, open the Component services element -> Computers -> My computer, press ”My Computer” PCM and open properties. - In the window that opens, go to the go to the ”COM Security” tab, and in turn open ”Change restrictions...” for Access Rights and for Launch and Activation.
- Add, if there′s none, the ”DCOM Users” group and make sure, that it has permission for remote access.
- Apply and close.
Note: usually, by default, the ”DCOM Users” group is already installed in the DCOM security settings, and it is enough to add it in the WMI settings and add the desired user to the group on whose behalf the installation will take place.
Troubleshooting Workstation Connection to the Server
If the workstation can "see" the coordinator but cannot establish a session with the server:
Step 1. Fully Close Handy Backup
Stop all Handy Backup processes and services:
- Open Task Manager (press [Ctrl] + [Shift] + [Esc]).
- Go to the Processes tab, locate the processes associated with Handy Backup, and terminate them.
- Then, go to the Services tab, find the Handy Backup Network Server 8 and Handy Backup Network Workstation 8 services, and stop them.
Step 2. Restart the Handy Backup Server
Open Command Prompt as Administrator:
- Press [Win] + [R], type cmd, and press [Ctrl] + [Shift] + [Enter].
Type the following command and press Enter:
HandyBackupServer8 --CustomORBParameters "-ORBInitRef NameService=iiop://localhost:127.0.0.1:1855/NameService -ORBListenEndpoints iiop://"
Step 3. Check the Client's Connection to the Server
Launch the Handy Backup client. Verify that the client connects successfully to the server. Ensure that the server appears in the list of available connections on the workstation.
To Run the Server as a Service
To ensure that Handy Backup starts automatically with the required parameters, follow these steps:
Step 1. Open the Registry Editor
Press [Win] + [R], type regedit.exe, and press Enter.
In the Registry Editor, navigate to the following location:
HKEY_LOCAL_MACHINE\SYSTEM\CurrentControlSet\Services
Step 2. Locate the Handy Backup Service Folder
In the Services section, find the folder corresponding to the Handy Backup service.

Step 3. Modify the Startup Parameters
Double-click the service entry to open its parameters.
In the parameter field, add:
--CustomORBParameters "-ORBInitRef NameService=iiop://localhost:127.0.0.1:1855/NameService -ORBListenEndpoints iiop://"
Step 4. Save Changes
Close the Registry Editor and restart the Handy Backup service.
The list of workstations is empty or lacks some of the networked computers. Why?
To make Backup Network Workstation appear in the list of available sources of data for backup, it is necessary to configure it:
- Open the Workstation Configuration file with any text editor;
C:\Users\%Username%\AppData\Roaming\Novosoft\Handy Backup 7\Settings\Services\ workstation.hbl
- Find and modify the CoordinatorHost parameter:
<param name="CoordinatorHost">localhost</param>
- Restart the Network Agent.
If the workstation is configured correctly, but the list of available sources is still missing, make sure that there is a Novosoft Backup Network Workstation service running on the workstation. If the service is not running, start it.
If the workstation still does not appear in the list, then most likely it can’t access the server (or vice versa). Re-check the address that you set in the field “Server host name” of configuration utility, and check your firewall settings.
Note: For the case when the server and workstation are on different subnets separated by a NAT, it is necessary to configure appropriate routing, so the workstation and server can communicate.
You can read how to install and configure agents for Windows in the User Manual of Handy Backup.
Related solutions: Handy Backup Server Network.
Why workstation contents are empty after selecting a Backup Network plug-in?
Sometimes, when you shut down or restart workstations, or restart the workstation service (Novosoft Backup Network Workstation), the server may “remember” remote PCs and continue showing objects that are already obsolete. When this happens, some of the workstations that appear after you select “Backup Network” may be empty.
- Make sure that the networked computer that you want to back up is turned on, and the Novosoft Backup Network Workstation service is running on it.
- To re-register the workstation on the server and make it show its contents, restart the service.
Generally, the situation where you will need to restart the service should never happen. However, this is a right way to make the server re-register the workstation whenever you need it.
My workstations are running and configured correctly, but selection of the Backup Network plug-in still shows nothing. Why?
Sometimes when you restart the server, or the Novosoft Backup Network Coordinator service on the server, it may lose the list of workstations, so they become unavailable for selection through the Backup Network option in the menu. To resolve this problem:
- Restart the Novosoft Backup Network Workstation service on each workstation on the network.