VMware Workstation Plug-in
VMware Workstation Plug-in: This dedicated plug-in allows saving images of VMware virtual machines. In this chapter, we are describing how to backup VMware images from outside using the plug-in.
Backup Task
- Open Handy Backup, call a New Task Wizard and create a new backup task on the Step 1.
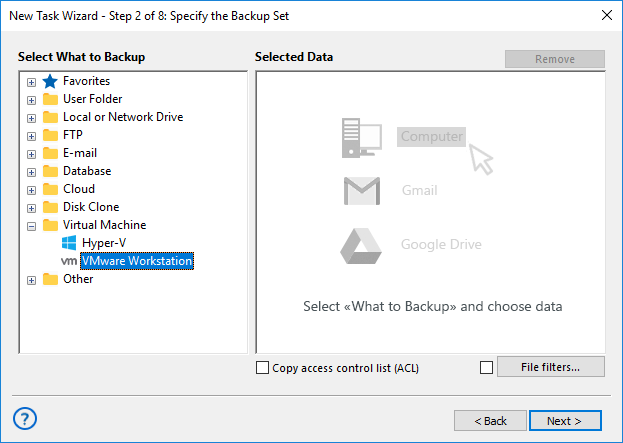
- On the Step 2, click onto the "VMware Workstation" data source from the "Virtual Machine" group on the left panel.

- Select the "Create a connection…" option by double-clicking on it.
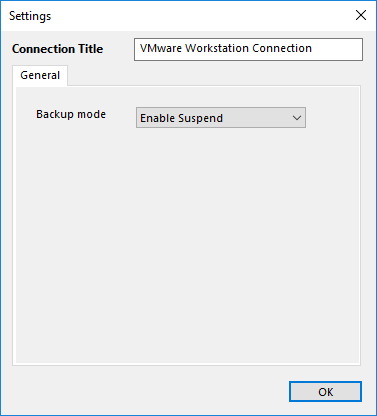
- In a new dialog window, select either a "Hot" mode (without stopping a virtual machine) or an "Enable suspend" mode (with stopping a VM to take a perfect snapshot).

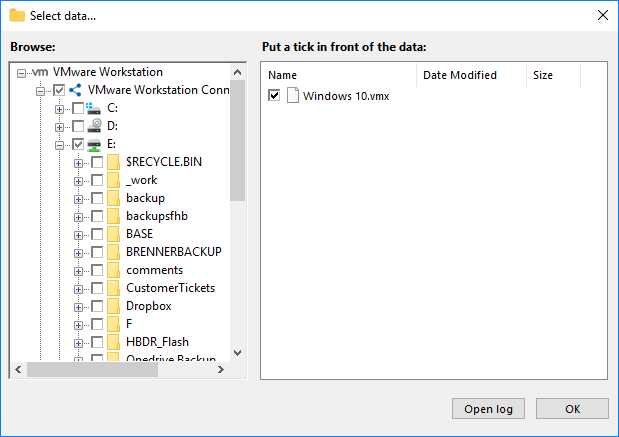
- Then click OK. In a new window, mark checkboxes against names of particular VMware workstation instances.

- Proceed the task creation as usual.
Restoring Task from a VMware Image
The current version of Handy Backup 7 does not allow restoration of VMware workstations to another place. You can automatically restore a VMware snapshot only only to its original location. To create a restoration task, please follow the next steps:
- Open a New Task Wizard. Select the "Restore" task type on the Step 1, then click "Next".
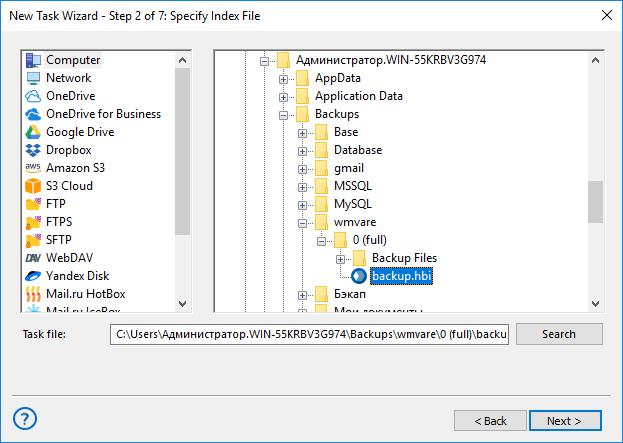
- On the Step 2, search for the index file (backup.hbi) located in the storage folder.

- Select the file mentioned above, and then click the "Next" button.
Attention: Do not click the "Change Location" button on the restoration dialog – it would not work for VMware workstations.
- Skip all next steps of a restoration task wizard by clicking the "Next" button on each step, until you will give your task a name and complete creating your task.
When starting VMware restoration, the plug-in firstly stops all running instances of VMware virtual machines and all Windows services relating to these instances. Then the plug-in copies VMware backup images to their original locations, and restarts the services it stop earlier.
Related Pages: